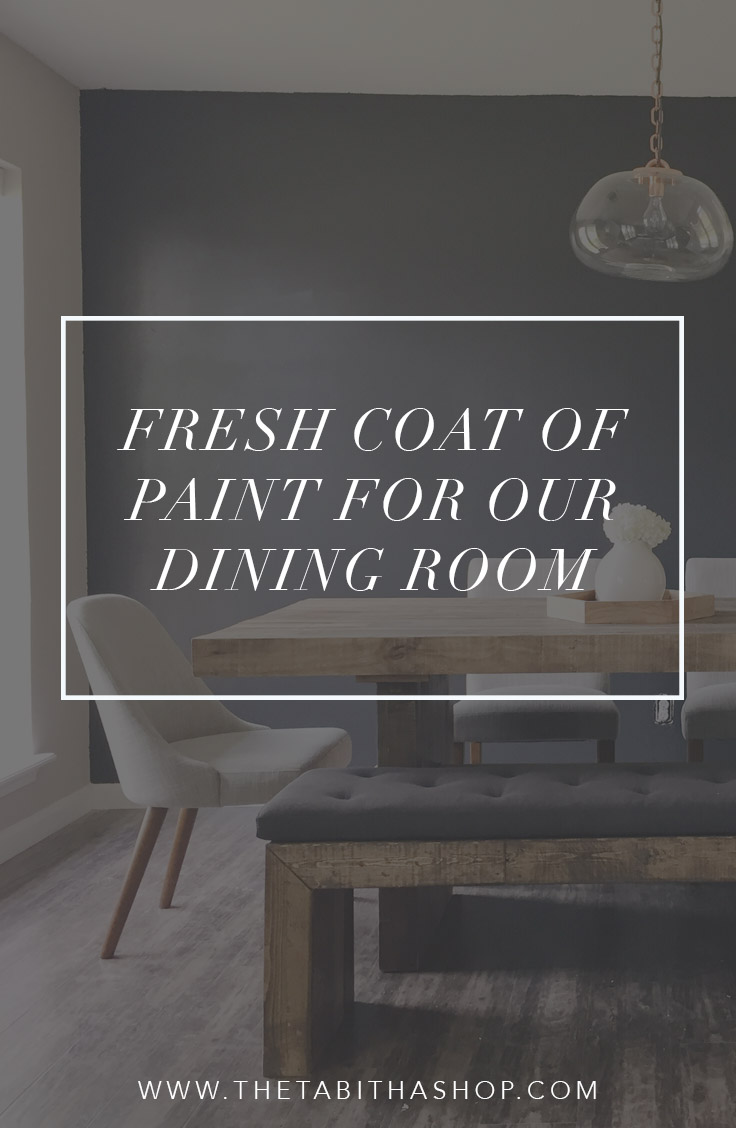
Fresh Coat of Paint for our Dining Room
Today's post is for all of you brides who can't wait to start nesting. Sure, you're excited about the wedding, but it's the pulling together of a cozy, comfortable home for you and your husband that really gets your heart fluttering.
We purchased our 1972 home six months ago and have been slowly making updates here and there. Thankfully, this 3 bedroom 2 bath place was professionally flipped before we signed the papers, so all of our updates are geared toward making the house more of our aesthetic, instead of making it livable.
Most recently, we tackled our dining room. This project was affectionally called "The Wall" around here. Like most house projects, our process started with a simple question: "What if we painted this wall a dark color?" which turned into an obsessive Pinterest research binge which turned into a Thursday evening Home Depot run. A gallon of primer, a gallon of Behr's "Cracked Pepper" and a few paint rollers later and we had ourselves a pretty new wall.

There were, of course, quite a few obstacles in the in-between, though.

This is a before picture, taken a few months before our wall project and right before we replaced that admittedly-nice-but-bulky-and-boring chandelier, which is one of the ways we are making this place a little bit more "us".

The biggest thorn in my side for this project was the intense and pervasive texture on these walls. You can't escape it anywhere in this place. This picture was the general landscape of the wall behind our dining table. I wanted it gone.

So, I tried to even it out by spreading all purpose joint compound or "mud" all over but the process proved far too time-consuming and messy for me. I read several DIY and forum posts that explained the exhausting and terrible process of covering up the texture. I was resolving to just forever leave the texture, until a friend rescued me by suggesting to "just scrape it off." Duh.

My husband and I tried it the next day and the stuff came off like butter. We lightly dampened an area with a spray bottle and after a few minutes' soak, carefully scraped it off with a taping knife. We would pull swaths of it off the wall, as if the wall was just waiting for us to rid it of its bumpy prison.
We were lucky to find a newly installed dry wall underneath the texture. After some quick sanding, we layered three thick coats of primer and an additional three coats of the paint on the wall. Clearly, we're not messing around.


But the results were oh so worth it! We love it! My husband, ever the wood worker, has cut and stained some cedar shelving that will go in the back right corner and we'll put a plant in the left corner, closest to the window, while leaving the middle of the wall completely blank. It doesn't need much on it - it's so pretty all by itself.
As we continue to update the house, I'll keep showing you around. In the meantime, you can fantasize about your future dining room by clicking through my dining room Pinterest board. If you follow me on Pinterest, I'll keep you inspired with so much more to come!
Comments
Post a Comment